Creating pull plans for a project
You use the Project Master Plan page to create pull plans for a project. You can create any number of pull plans for a project, with each pull plan relating to one or more activities in the project's master plan. If a single activity in the master plan covers a large number of individual tasks that need to be carried out, you may want to create a pull plan relating only to that one activity. Alternatively, you may want to create a pull plan relating to a series of activities in the master plan. If the activities in the master plan have been grouped logically into different summary groups, it may make sense to create a pull plan relating to one or more summary tasks.
To create a pull plan for a project, you must view its master plan. To do this:
- Click Projects in the left pane. The Projects page appears.
- Click a project in the list. The Project Details page appears.
- Click Master Plan at the top of the page. The Project Master Plan page appears. A check box appears to the left of the name of each activity in the spreadsheet:
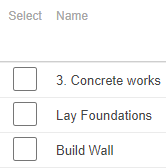
You use these check boxes to specify the activities for which you want to create a pull plan. If an activity has already been included in a pull plan, its check box appears ghosted:
To create a pull plan for a project:
- On the Project Master Plan page, select the check boxes to the left of the activities for which you want to create a pull plan. This may be one activity or milestone, one summary task, or any number of activities, milestones and summary tasks.
Each activity can only be included in a single pull plan; if an activity is already included in a pull plan, its check box is ghosted and you cannot select it again for inclusion in another pull plan. - Click New Pull Plan above the bar chart. The New Pull Plan dialog appears, with a suggested title for the pull plan. The title defaults to the name of the pull plan's first activity, truncated to 50 characters if necessary.
- Edit the title of the pull plan if required, then click Create. A new pull plan is created for the selected activities and the Pull Plan Details page appears. This page displays high-level details of the pull plan.
- Enter any textual notes relating to the pull plan in the Notes field.
- Click the Project Tags dropdown and select any project tags that are applicable. You can select any number of project tags.
Any tags that you select are added to the list of assigned tags beneath the Project Tags field. Click to the right of a project tag to unassign it.
Once you have created a pull plan, you can start creating tasks within it.
Viewing and editing pull plan details
Viewing a pull plan as a Gantt chart
Working with tasks in a pull plan