Creating a project timeline
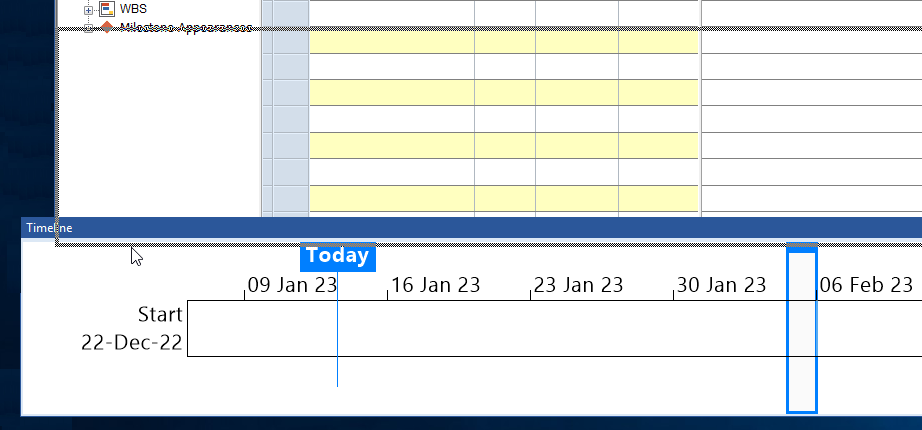
To create a project timeline, on the View tab, in the Show group, click Timeline. The timeline pane appears:
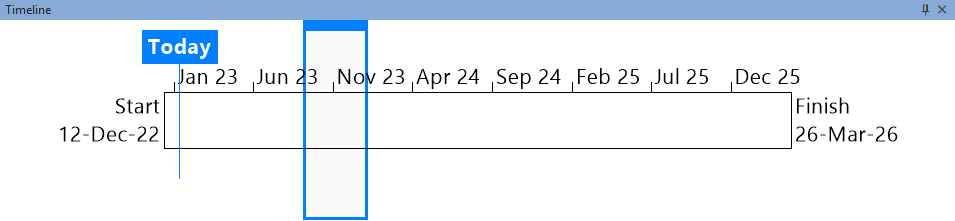
The timeline pane displays the following elements:
- Start and finish dates, to the left and right of the timeline. By default, these show the start and finish dates of the project so that the timeline covers the entire duration of the project, but you can change this.
- A date scale along the top with tick marks. For projects with a duration of a year or less, tick marks are displayed at weekly intervals; for projects with a duration of more than a year, tick marks are displayed at monthly intervals.
- A dropline indicating today's date. You can configure the colour and font of the dropline.
- A 'scroll area' - an area bordered by a coloured box (blue by default) that indicates the time period that is shown in the currently active view. You can configure the colour of the scroll area's bounding box.
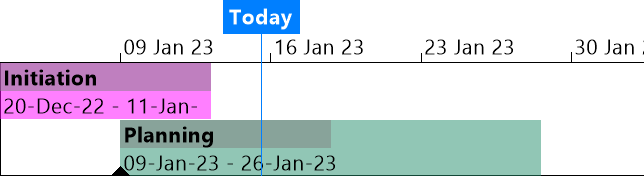
Once you have created a project timeline, you can add tasks to it.
Changing the position of the timeline pane
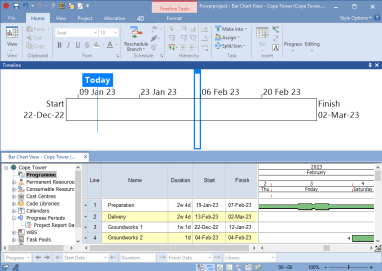
The timeline pane appears initially above the project view and bar chart, but you can change its position and display it as a pane that floats above the Asta Powerproject window by clicking and dragging its title bar.
Above the project view and bar chart:
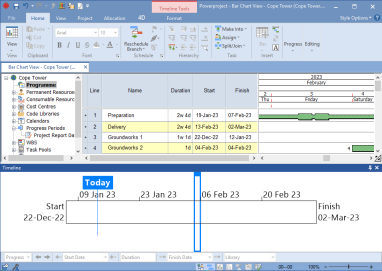
Below the project view and bar chart:
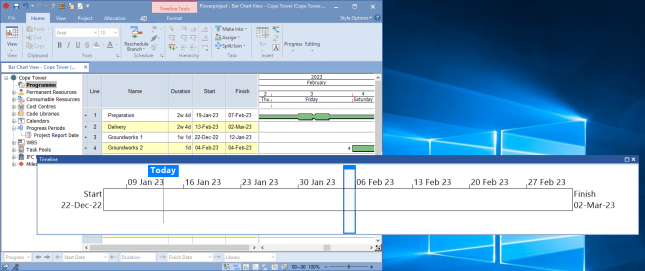
As a pane that floats above the Asta Powerproject window (particularly useful if you use two monitors or if you want to view the timeline with a greater width):
- Click the mouse pointer in the title bar of the timeline pane:

- Keeping the left mouse button held down, drag the title bar to a different location within the Asta Powerproject window. When you move the pane to a section of the window to which it can be anchored - towards the top or bottom of the window - an outlined rectangle appears to indicate the position in which the pane will be anchored:
- Release the mouse button to move the pane to this position.
- Click the mouse pointer in the title bar of the timeline pane:
- Keeping the left mouse button held down, drag the title bar to a different location.
- Release the mouse button to move the pane to this position.
If Asta Powerproject is not maximised, or if you are using two monitors, you can drag the floating pane and position it away from the Asta Powerproject window. If you do so, you can drag it back and reincorporate it into the Asta Powerproject window at any time
Specifying the date range of the timeline
By default, the project timeline covers the entire date range of the project, but you can specify a custom date range. This is useful if you want to create a timeline that depicts a particular time period within a project - the next few weeks or months, for example.
To specify the date range of the timeline:
- If the timeline pane is not currently displayed, on the View tab, in the Show group, click Timeline to display it.
- Click in the timeline pane.
- On the Format tab, in the Show/Hide group, click Timeline Date Range. The Timeline Date Range dialog appears.
- To make the project timeline cover the entire date range of the project, click the Use project start and finish dates radio button; to make it cover a different range of dates, click the Custom dates radio button then specify and start date and a finish date.
- Click OK.
Displaying and hiding the 'Today' marker dropline
By default, a dropline indicating today's date appears in the timeline:
You can specify whether or not to display the dropline. You may want to hide the dropline when exporting or printing the timeline.
To specify whether to display the 'Today' marker dropline:
- Click in the timeline pane.
- On the Format tab, in the Show/Hide group, select the Today Marker check box to display the dropline, or clear the check box to omit the dropline from the timeline.
Introduction to project timelines
Adding tasks to a project timeline
Using the timeline scroll area
Configuring a project timeline