Configuring a project timeline
While working with a project timeline, you can use the controls on the Format tab of the Ribbon to configure the timeline, changing its appearance and the appearance of tasks within it.
To display the timeline configuration tools:
- If the timeline pane is not currently displayed, on the View tab, in the Show group, click Timeline to display it.
- Click in the timeline pane.
- Click the Format tab of the Ribbon.
The Format tab comprises the following controls, split into a number of different groups, as described below.
Controls in the Style group
| Timeline Appearance |
Click this control to display the Timeline Appearance dialog, which you can use to:
|
| Date Format | Click this dropdown control to specify the format in which to display dates in the project timeline. |
| Background Colour |
Click this dropdown control to select a background colour for the task that is currently selected in the timeline.
|
| Font Colour |
Click this dropdown control to select a colour in which to display text for the task that is currently selected in the timeline.
|
Controls in the Show/Hide group
| Timeline Date Range |
Click this control to display the Timeline Date Range dialog, which you can use to specify the date range that should be covered by the project timeline.
|
| Multiple Rows |
Select this check box to display tasks that overlap each other on separate rows in the timeline, or clear the check box to display tasks on a single row even if they overlap each other. Displaying tasks on multiple rows can make the timeline more readable, but means that it takes up more space.
In the following illustration, two overlapping tasks are displayed on the same row:
In the following illustration, the two overlapping tasks are displayed on multiple rows:
|
| Task Progress |
Select this check box to indicate the percentage complete of each task in the timeline by applying shading to the top half of the tasks, or clear the check box to omit the progress indicator from tasks in the timeline. Progress is indicated on tasks when they are displayed as bars, but not when they are displayed as callouts.
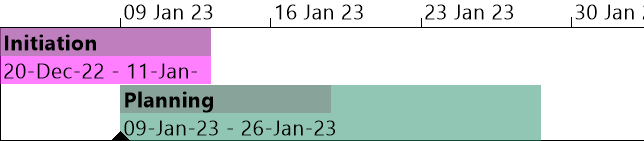
In the following illustration, the 'Initiation' task is shown to be 100% complete and the 'Planning' task is shown to be 50% complete:
|
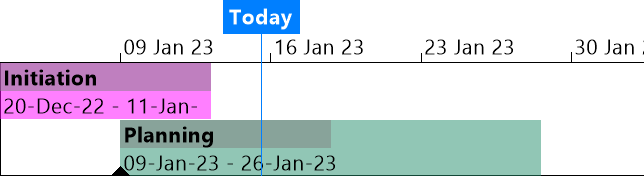
| Today Marker |
Select this check box to display a dropline indicating today's date in the timeline, or clear the check box to omit the dropline from the timeline.
If you display a task as a callout, the callout can overlap the today marker at the top of the dropline.
You may want to hide the today marker when exporting or printing the timeline.
|
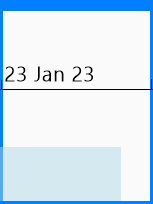
| Scroll Area |
Select this check box to display an area bordered by a coloured box (blue by default) that indicates the time period that is shown in the currently active view, or clear the check box to omit the scroll area from the timeline.
|

Controls in the Current Selection group
| Display as Bar |
Click this control to display the task that is currently selected in the timeline in the form of a bar, as illustrated below:
|
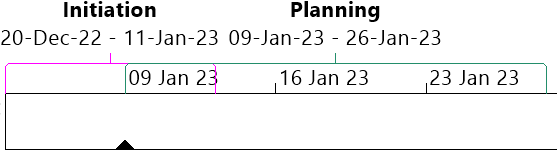
| Display as Callout |
Click this control to display the task that is currently selected in the timeline in the form of a callout, as illustrated below:
If you display a task as a callout, progress is not displayed against it, even if you select the Task Progress check box.
|
| Remove from Timeline |
Click this control to remove the task that is currently selected in the timeline from the timeline.
|
| Go To Task |
Click this control to find and select the task that is currently selected in the timeline
|
| Properties | Click this control to display the Bar and Task Properties dialog and show the properties of the task that is currently selected in the timeline. |

Controls in the Export group
| Export Timeline |
Click this dropdown control to export the timeline to the Windows Clipboard, from where you can paste it into another application, or to print it.
|
Introduction to project timelines
Adding tasks to a project timeline
Using the timeline scroll area