Working with calendar views
Calendar views display the tasks in one or more
To display a calendar view, on the View tab, in the Views group, click the View dropdown and select the calendar view you want to display. The first time you open a calendar view, it displays the Programme chart and the month containing today's date. Once a calendar view has been opened, you use the project view to specify the scope of what is displayed in it, in the same way as you use the project view to specify the scope of what is displayed in a bar chart view: click a
An example calendar view is displayed below:
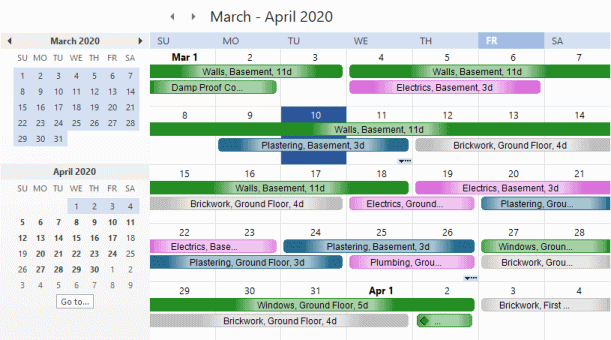
The calendar view is divided into two panes: to the left is the date picker and to the right is the calendar view itself, displaying the tasks
Up to three items of identifying information is displayed on each task
You can select tasks in the calendar view by clicking them. Selected tasks appear bounded by a black rectangle:

You can CTRL-click and SHIFT-click to select more than one task at the same time.
To delete a task when a calendar view is displayed, right-click it and select Delete; to view the properties of a task, right-click it and select Properties.
If the current view is a calendar view, you can assign objects to tasks in the calendar view by dragging and dropping them from the project view in the same way as you can assign objects to tasks in a bar chart view.
Using the calendar view's date picker
Click a date in the date picker to display that date in the calendar view, or click Go to to select a date from a menu, including the project start date, the progress period report date and the project end date:
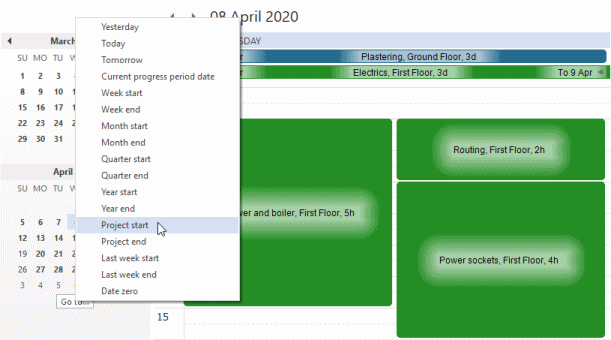
The project start and end dates are the start and end dates of the programme of projects, not of individual projects within a programme. As you can specify a different date zero for each view, it is possible to have more than one date zero in a project; if you choose to view date zero in the calendar view's date picker, the calendar view will display the earliest edited date zero in the project.
You can toggle the date picker display on and off. To do this, either right-click the calendar view and select Date Picker, or click Date Picker, on the Format tab, in the Show/Hide group.
Switching between Day, Week and Month modes
The calendar view can display information in three different modes: Day, Week and Month. To switch between these modes, either right-click the calendar view and select Day, Week, or Month, or click Day, Week or Month, on the Format tab, in the Appearance group.
The calendar view switches between these modes automatically as required to best display the dates that you select in the date picker. For example, if you click and drag in the date picker to select a large block of dates when in Day mode, the calendar view will switch to Month mode; if you CTRL-select a selection of days that are in different weeks when in Week mode, the calendar view will switch to either Month or Day mode - whichever is most appropriate.
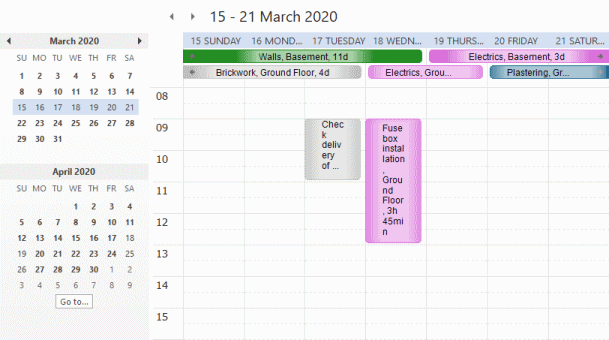
Working in Day mode
Day mode displays the tasks

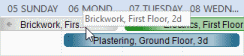
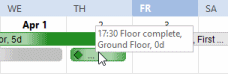
In the above illustration, which shows the tasks that fall on 8th April:
- The 'Plastering, Ground Floor' task starts on 6th April and finishes on 8th April.
- The 'Electrics, First Floor' task starts on 7th April and finishes on 9th April.
- The 'Shower and boiler, First Floor', 'Routing, First Floor' and 'Power sockets, First Floor' tasks start and finish at various times on 8th April.
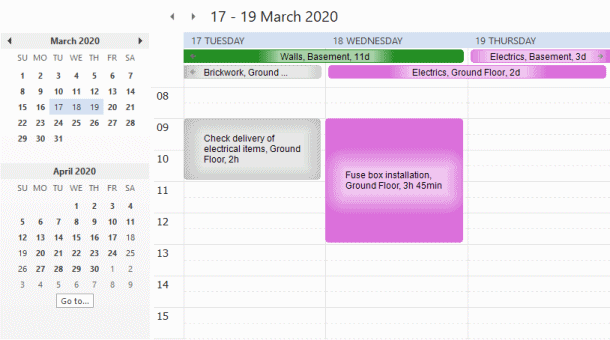
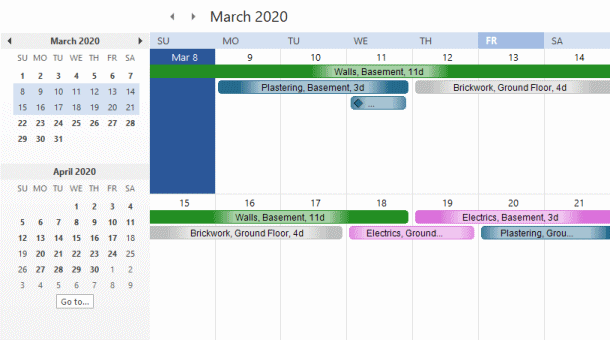
When in Day mode, you can CTRL or SHIFT-click multiple dates to display more than one date at the same time. In the illustration below, the 17th, 18th and 19th March have been SHIFT-clicked in the date picker, so the calendar view displays information on all three of these days at the same time:
You can also select multiple days by clicking one day in the date picker and dragging the mouse pointer over additional days.
When in Day mode, click the arrows at the top of the calendar view to move from one day to another:

Click the left arrow to move to the previous day; click the right arrow to move to the next day.
Working in Week mode
Week mode displays the tasks
When in Week mode, you can SHIFT-click multiple weeks to display more than one week at the same time. In the illustration below, the weeks commencing 8th and 15th March have been SHIFT-clicked in the date picker, so the calendar view displays information on both of these weeks at the same time:
If you CTRL-click one or more days outside of the currently-selected week when in Week mode, the calendar view is updated to display the currently-selected week plus the additional days.
When in Week mode, if you select days in multiple weeks by clicking one day in the date picker and dragging the mouse pointer over additional days, the calendar view is switched to Day or Month view, whichever is most appropriate.
When in Week mode, click the arrows at the top of the calendar view to move from one week to another:

Click the left arrow to move to the previous week; click the right arrow to move to the next week.
Working in Month mode
Month mode displays the tasks
If a day has more tasks than can be displayed in Month mode, a downwards-pointing arrow and ellipsis appear at the bottom of the day:

Click this arrow to display the day in Day mode, in which there is space to display all tasks.
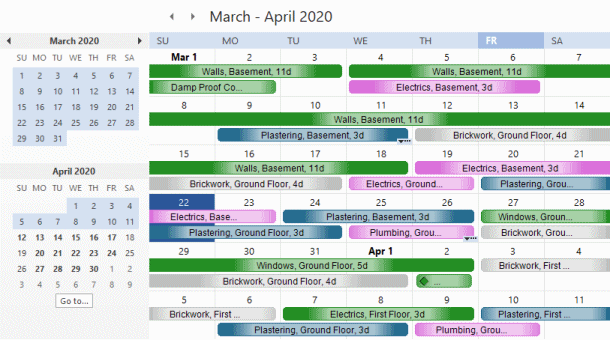
When in Month mode, you can SHIFT-click multiple months to display dates from more than one month at the same time. In the illustration below, the dates in both March and April have been SHIFT-clicked in the date picker, so the calendar view displays information on both of these months at the same time:
When in Month mode, click the arrows at the top of the calendar view to move from one month to another:

Click the left arrow to move to the previous month; click the right arrow to move to the next month.
Milestones in the calendar view
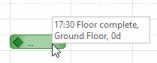
Milestones appear as illustrated below in the calendar view:
- In Day mode:

- In Week mode:
- In Month mode:
Milestone appearances can vary; milestones appear in calendar views using the same appearance as they have in bar chart views.
Viewing dates that contain no tasks
If the current selection of dates in the calendar view contains no tasks, 'Previous Appointment' and 'Next Appointment' controls appear at the left and right of the calendar view:
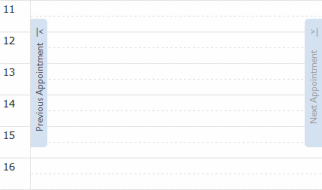
Click these controls to move to the previous or next date on which tasks are present. If there is no previous or next date on which tasks are present, these controls appear ghosted. The 'Next Appointment' control is ghosted in the illustration above, showing that there are no dates after the currently selected date that contain tasks.
Specifying what is displayed in a calendar view