Step 3 - Defining the chart area
Now you have ensured that the border will print in landscape on the paper loaded in your printer, you will define the area in which a chart or histogram will be placed when you print the border from Asta Powerproject or Asta Easyplan.
To define the chart area:
- Click
 .
. - Click and drag the cursor diagonally across the border to outline the area of the border that you want to chart area to occupy.
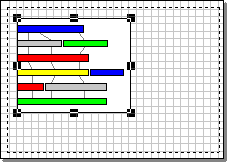
- Release the left mouse button when the chart area is approximately 6 inches wide by 5 inches tall - the area's width and height is displayed in the status bar as you draw it. The chart area is displayed on the border:
Powerdraw uses the unit of measurement that is specified in your computer's Control Panel. Refer to your Windows® documentation for details of how to change your unit of measurement.
If you are planning to use a border for printing from within Asta Powerproject 4D, you can also define an area in which the 3D model that is currently displayed in the IFC Model pane will be printed, using the  toolbar button. This enables Asta Powerproject 4D users to print graphical representations of 3D models alongside the corresponding project plans.
In step 4, you will draw a background for the border.
|
|
|