Step 2 - Specifying the page layout
Now you have created a new border, you will select the paper size on which you want to print the border, and change its orientation to landscape.
To specify the page layout:
- Select the Page Setup command from the File menu. You see the Page Setup dialog.
- Select the size of paper that you currently have loaded in your printer, for example A4 or Letter, in the Paper Size field.
- Select the Landscape radio button.
- Depending on the paper size you select, you may see a dialog warning you that the current margins may not be valid for the new page orientation. If this dialog appears, click OK to close the dialog, then click Auto-set Margins to display the Auto-set Margins dialog. Ensure that The current printer is selected, then click OK to close the dialog and return to the Page Setup dialog.
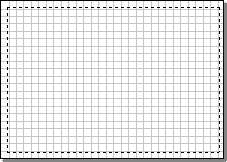
The margins are adjusted for printing a landscape page on your current printer. - Click OK to close the Page Setup dialog. The border now appears in landscape orientation:

In step 3, you will define the area that represents the place in which a chart or histogram will be placed for output.