Creating whiteboard swimlanes based on build locations
You can use build locations to categorise pull plan tasks according to the place at which they are carried out. For example, you could have locations that represent different plot numbers, or different floors of a multistorey building. When using a whiteboard to manage pull plans, you can create a swimlane for each build location, then move the tasks on the whiteboard into the appropriate swimlane to group tasks by build location.
To create a swimlane for a build location in a pull plan's whiteboard:
- Click Pull Plans in the left pane. The Pull Plans page appears.
- Click a pull plan in the list.
- Click Whiteboard.
- If the whiteboard swimlanes currently represent project teams, click the Swimlanes control and select Build Locations to display a swimlane for each build location.
- On the Pull Plan Whiteboard page, click
 at the bottom-right of an existing swimlane to display the swimlane menu:
- Click Insert Swimlane Above to insert a new swimlane immediately above the existing swimlane, or click Insert Swimlane Below to insert a new swimlane immediately beneath the existing swimlane. The Insert Swimlane Above or Insert Swimlane Below dialog appears.
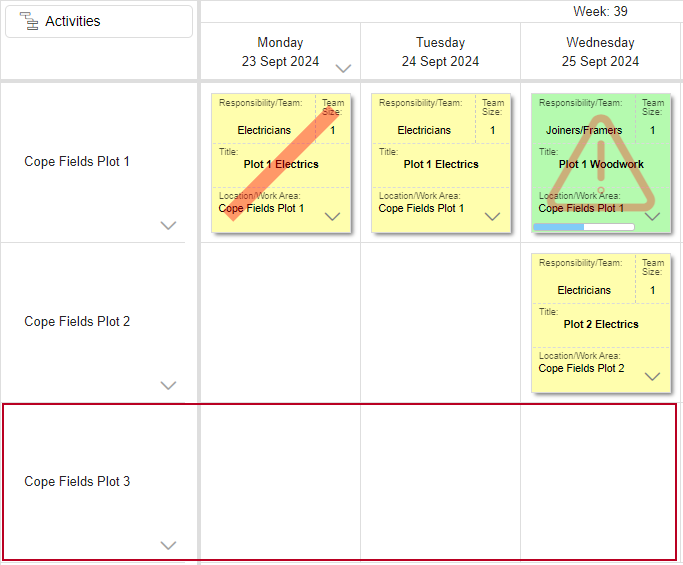
- A Build Location field is displayed in the dialog. Select the build location for which you want to create a swimline - for example 'Plot 3' - and click Insert. A new swimlane for the selected build location appears on the whiteboard:
If you want to create a swimlane for a build location that has not yet been created, you can click New Build Location in the Insert Swimlane Above or Insert Swimlane Below dialog to create the new build location. Once you have created the new build location, a swimlane for that location is added to the whiteboard.
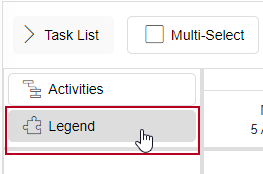
You can view a legend that shows the project teams that the colours used in the whiteboard represent. This is particularly useful if the whiteboard swimlanes currently represent build locations.
To view a project team legend, click the Legend button at the top-left of the whiteboard:
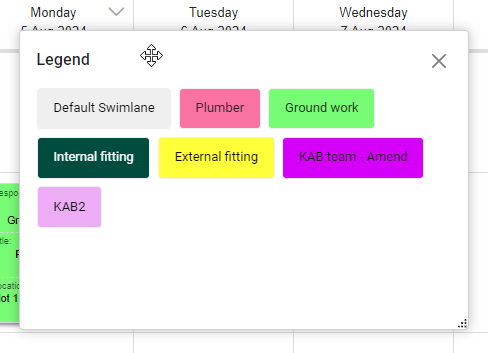
The legend appears in a popup. You can move the popup around the screen by clicking and dragging its title bar:
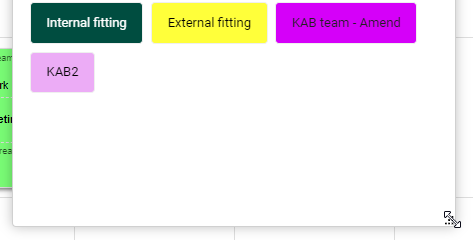
You can resize the popup by clicking and dragging its bottom-right corner:
To hide the legend popup, click  .
.