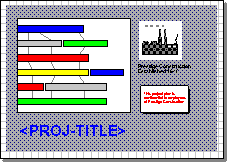
Step 9 - Adding the project title
Now you have added a shadowed text box to the border, you will add the project title. You do this by inserting a field into the border. A field is a string of characters representing a piece of information in a project, chart or view. When you load a border containing fields into Asta Powerproject or Asta Easyplan, the fields are replaced by the information they represent, taken from the project.
To add the project title:
- Click
 and
click on the border below the chart area.
 - Select the Insert Field command from the Draw menu, select the Project Items submenu, then select the PROJ-TITLE command. The PROJ-TITLE field appears below the chart area.
- Change the font, style, size and colour of this text as before using the style bar controls to make the field stand out:

When you load this border into Asta Powerproject or Asta Easyplan, the field will be replaced by the actual title of the project into which you load the border.
In step 10, you will save the border.