Filtering and sorting lists
Some Asta Vision pages comprise lists of objects. For example, the Projects page comprises a list of your projects; the Users page comprises a list of your Asta Vision users. You can filter the lists so that they display only certain information, and sort the lists so that they display items in an appropriate order.
The simplest way of filtering a list is to enter an alphanumeric string in the Filter... field at the top-right of the list:
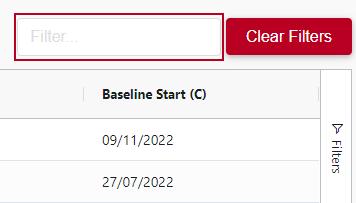
The list is filtered instantly as you enter text into the field, so that it displays only items that contain the text you are entering in one or more columns. For example:
- Enter a date to filter the list for items with the date you enter in any column. For the project list, that may be the project start date, the project finish date, or any other date that is displayed in a column.
- Enter one or more words to filter the list for items with the words you enter in any column. For the project list, the words may be included in the project name, the project location, or in any other column.
Once you have applied a simple filter to a list, you can then apply a further filter according to the data in a particular column, as described below.
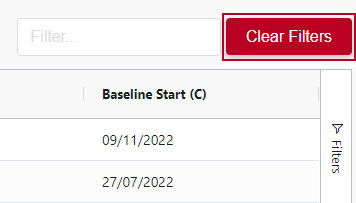
To clear the filter and return to the default list view, click Clear Filters at the top-right of the list:
You can filter lists according to the data in any of the columns. For example, you might want to filter the project list to display only projects with a start date that is later than a given date, or filter the user list to display only users with a particular surname. Once you have filtered a list according to the data in one column, you can then filter it further, according to the data in one or more other columns.
To filter a list according to the data in a particular column:
- Position the mouse pointer over the heading of the column according to which you want to filter the list, until it appears as
 .
. - A menu icon -
 - appears at the right-hand side of the column heading:
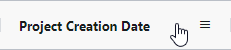
- Click . A filter drop-down appears. The controls that appear on the drop-down depend on the type of information that is displayed in the column - see below for details.
- Use the controls on the filter drop-down to specify how you want to filter the list. In some cases, the list is filtered instantly as you specify the criteria; in other cases, you need to click Apply to filter the list according to your criteria.
- If you want to further filter the list according to the data in another column, follow the above steps to apply a secondary - or further - filter.
On some pages, you can also access the column filter controls by clicking Filters at the right-hand side of the list:

This displays a pull-out pane, which includes all available column filters for a page, each one with its own drop-down:

Click Filters again to close the pull-out pane when you have finished specifying your filter criteria.
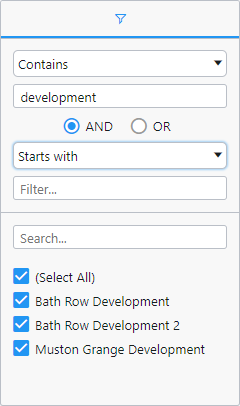
A sample set of filter controls for columns displaying alphanumeric information is displayed below, followed by an explanation of each control:
| Control | Description |
|---|---|

|
Specify whether to filter for items for which the column:
|

|
Enter the text on which you want to filter. For example, to filter for items where this column contains, or does not contain, the text 'development', enter 'development' in this field - as in the illustration above.
This field is not case-sensitive, so if you filter for items where this column contains the text 'development', items where the column contains 'development', 'Development' or 'DEVELOPMENT' will all pass the filter criteria.
If you enter text in this field, the next three fields appear, enabling you to enter a second filter criteria for the column. |

|
If you want to enter a second filter criterion for the column, click AND to specify that items must meet both criteria to pass the filter, or click OR to specify that they must meet either criterion to pass the filter.
For example, you could filter for items for which a column starts with the code 'ABC1' and contains the text 'development'; or you could filter for items for which a column 'Starts with' the code 'ABC1' or contains the text 'development'. |

|
If you are specifying a second filter criterion, specify whether to filter for items for which the column:
|
|
|
If you are specifying a second filter criterion, enter the text on which you want to filter - in the same way you did in the similar field above. |

|
Below this field is a list of the values that meet your filter criteria. You can use this field to filter the values in this list: if you enter text in this field, the list below is updated so that it contains only those values that contain the text you have entered.
For example, if you entered 'bath row' in this field, the list of values displayed in the filter control illustrated above would contain only 'Bath Row Development' and 'Bath Row Development 2'; 'Muston Grange Development' would be removed from the list.
Using this field to remove values from the list below does not remove the corresponding items from the main list on the page; to do this, you can clear an item's check box. |
|
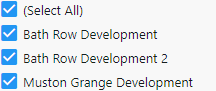
A list of the values displayed in the column, with a check box to the left of each value. When no filter is applied, all values are displayed here; as you enter filter criteria using the above controls, the number of items displayed here is reduced and only values that meet the criteria you specify are displayed.
Clear a check box to omit the corresponding item from the list, even if it meets the filter criteria you specify; select a check box to redisplay the item in the list.
Clear the (Select All) check box to omit all items from the list, even if they meet the filter criteria you specify; select the (Select All) check box to redisplay all items in the list. |
A sample set of filter controls for columns displaying dates is displayed below, followed by an explanation of each control:

| Control | Description |
|---|---|

|
Specify whether to filter for items for which the column:
|

|
Enter the date on which you want to filter. For example, to filter for items where this column contains a date that is greater than, or is less than, '23/04/2022', enter '23/04/2022' in this field.
You can specify a date by clicking and typing directly into the field, or by clicking
If you select 'In range' in the first control, an additional date selection field appears. Use the first field to enter the first date in the range, and the second field to enter the last date in the range. |
|
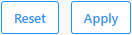
Click Apply to filter the list according to your filter criteria; click Reset to clear the filter criteria for this column. |
 to display a date picker control, from which you can select a date:
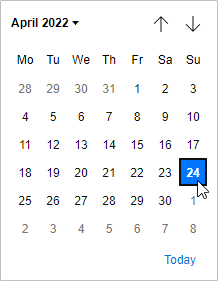
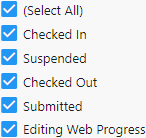
A sample set of filter controls for columns displaying system information such as 'Status' or 'UDF type' is displayed below, followed by an explanation of each control:
| Control | Description |
|---|---|
|
|
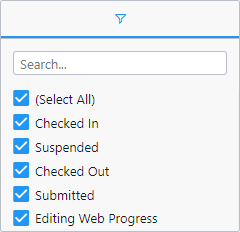
Below this field is a list of the values displayed in the column. You can use this field to filter the values in this list: if you enter text in this field, the list below is updated so that it contains only those values that contain the text you have entered.
For example, if you entered 'su' in this field, the list of values displayed in the filter control illustrated above would contain only 'Suspended' and 'Submitted', as these are the only two values that contain this text string; the other values would be removed from the list.
Using this field to remove values from the list below does not remove the corresponding items from the main list on the page; to do this, you can clear an item's check box. |
|
A list of the values displayed in the column, with a check box to the left of each value. When no filter is applied, all values are displayed here; as you enter filter criteria using the above control, the number of items displayed here is reduced and only values that meet the criteria you specify are displayed.
Clear a check box to omit the corresponding item from the list; select a check box to redisplay the item in the list.
Clear the (Select All) check box to omit all items from the list; select the (Select All) check box to redisplay all items in the list. |
To clear all filters and return to the default list view, click Clear Filters at the top-right of the list.
If you click Filters at the right-hand side of the project list on the Projects page, in addition to the 'Column Filters' drop-down, the pull-out pane contains a 'Grid Filters' drop-down, containing further 'Project Status' and 'Assigned Users' drop-downs, plus one drop-down for each project grid filter. In the following illustration, three project grid filters have been set up: 'Sector', 'Sub Sector' and 'Lead Planner':
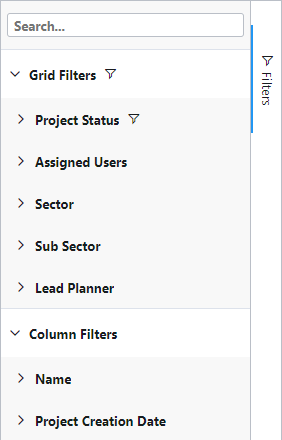
Use these filter controls to filter the projects in the list according to project status, assigned user and any project grid filters that have been set up.
You can sort lists according to the data in a particular column. For example, if you have a column displaying a name, you can sort the list by name alphanumerically from A to Z, or vice versa.
To sort a list according to the data in a particular column, click the column heading. An arrow appears to the right of the column heading, indicating the order of the sort:
-
 indicates that the list is sorted according to the column data in ascending order - for example from A to Z, or from the earliest date to the most recent:
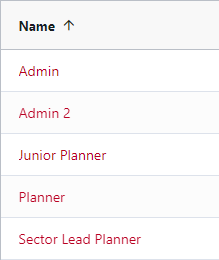
-
 indicates that the list is sorted according to the column data in descending order - for example from Z to A, or from the most recent date to the earliest:
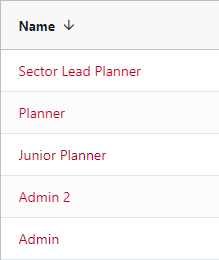
To reverse the order of the sort, click the column heading again. To cancel sorting on the column, click the column heading a third time. Each time you click the column heading, the way in which the column is sorted changes:
- Click 1: the list is sorted according to the column data in ascending order.
- Click 2: the list is sorted according to the column data in descending order.
- Click 3: the list is not sorted according to the column data.
To sort the list according to the data in a different column, click that column heading.
To clear all sorts and return to the default list view, click Clear Filters at the top-right of the list.
Changing the width of columns in a list