Adding existing projects to Asta Vision
You use the Project Details page to create new projects and programmes in Asta Vision by uploading existing Asta Powerproject projects and their baselines. This is a useful way of creating projects and programmes if you have started working on an Asta Powerproject project and subsequently want to add it to Asta Vision.
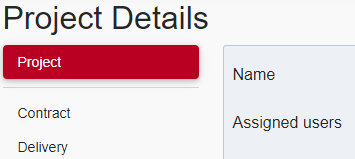
The left pane of this page displays 'Project', plus an entry for each programme type. In the illustration below, two programme types - Contract and Delivery - have been defined in Asta Vision:
You can upload one project and baseline for each programme type, but you do not need to upload a project for every programme type; you may have only a single project to upload, representing one of your programme types.
To access the Project Details page from the Asta Vision Home page, click Admin then click Add Existing Project.
To upload an existing project to Asta Vision:
- On the Project Details page, click Project in the left pane. You use the fields in the right pane to enter details of the project.
- Enter a descriptive name for the project in the Name field.
- To enable users to collaborate on the project's programmes - to enable them to work together on the project's programmes at the same time in Asta Powerproject - select the Collaboration enabled check box.
If your organisation uses Asta Vision Live, users are able to collaborate on a set number of programmes at any one time. If you reach your limit, you cannot start any more collaboration sessions unless you first end a collaboration session that is currently ongoing.
The Collaboration enabled check box appears only if your organisation uses Asta Vision Live. - Security, workflow and email rules can all be configured to apply to users who are assigned to projects directly. To assign users to the project directly:
- Click Assign User. The Assign User popup appears. You use this popup to assign users to the project directly. Security, workflow and email rules can all be configured to apply to users who are assigned to projects directly.
- Select the user role of the users you want to assign to the project in the User role field.
- If you have created a user-defined field with which to filter the users that appear in the Assign User popups, the name of the user-defined field appears beneath the User role field. For example, if you are using a user-defined field called 'Region' to filter users, a Region field appears here. The User name field will display only users that meet the selection you have made. For example, if you select a specific region, only users within that region will appear in the User name field.
- Select the users in the User name field. You can CTRL or SHIFT-select users to select more than one user.
Select '(All Roles)' in the User role field to view all users in the User name field, regardless of their role. You can then select any user from the alphabetical list. - Click Add. You return to the previous page, where a row appears for each selected user to the right of the Assigned users field.
Click Remove to the right of a user to unassign them from the project if required. If a user has been assigned to a project automatically as a result of their name being selected in a project-level, User-type user-defined field, you cannot unassign them from the project by simply editing the project and removing the user; you must also remove the user's name from the user-defined field. - Enter any notes relating to the project in the Notes field. A
 icon appears against all projects against which notes have been recorded on the Projects page. You can click this icon to view and edit a project's notes.
 - If any project-level user-defined fields have been set up, these appear on the page for you to complete. For example, if a 'Region' user-defined field has been configured, a Region field will appear for you to specify the region in which the project takes place.
Follow steps 7 to 14 below for each programme type for which you have a project to upload. You can only upload a project for a programme type if you have uploaded a programme and baseline for all previous programme types. - In the left pane, click the name of the programme type for which you want to upload a project. You use the fields in the right pane to specify the project and baseline to upload to enter details of the programme.
- Enter a descriptive name for the programme in the Programme revision name field.
- Against the Project file field, click Choose File. The Open dialog appears.
- Select the Asta Powerproject project you want to upload and click Open.
- If programme revision classification has been enabled, specify the type, or classification, to apply to the initial revision of this programme type, for example 'Progress update', 'Client change', or 'Scenario planning', in the Revision classification field. This field does not appear if programme revision classification has not been enabled.
This field may be called something other than 'Revision classification': its name is taken from what has been entered into the Name field on the Define Revision Classification page. - If you want to upload a corresponding baseline, enter a descriptive name for the baseline in the Baseline revision name field, then click Choose File against the Baseline file field and select the baseline project you want to upload.
- Select the In progress check box if you use the 'Editing Web Progress' programme status in your workflow and you want to apply this status to the programme and lock down the corresponding baseline, or clear the check box to set the status of the programme to 'Checked In'.
- If any programme-level user-defined fields have been set up, these appear on the page for you to complete. For example, if a 'Region' user-defined field has been configured, a Region field will appear for you to specify the region in which the programme takes place.
- Repeat steps 7 to 13 for any other programme types for which you want to upload and project. A tick appears against each programme type for which you have specified an Asta Powerproject project.
- When you have specified details of all the Asta Powerprojectprojects and baselines you want to upload, click Create. The specified project(s) and baseline(s) are uploaded and a project and the appropriate programme(s) are created, based on the files you have uploaded.
Any users you have assigned to the project are sent an email to inform them of their assignment. This includes users that you have assigned to the project directly and users you have selected in a user-defined field for which the Always assign user to project check box has been selected. If you have selected any users in a user-defined field for which the Send project assignment emails check box has been selected, they are send a project assignment email, without actually being assigned to the project.
Creating projects and programmes
Editing projects and programmes
Using Asta Vision Live to enable users to collaborate on projects