Sorting and grouping tasks in a project
You can sort/group the tasks in a project to reorder the project according to criteria such as start date, code library, cost and progress. Here, you will create and apply a sort/group that sorts/groups tasks according to the codes that have been assigned to them from the Sub-Contractors code library.
- On the View tab, in the View Data group, click the Sort/Group dropdown and select New. The Sort/Group Properties dialog appears:
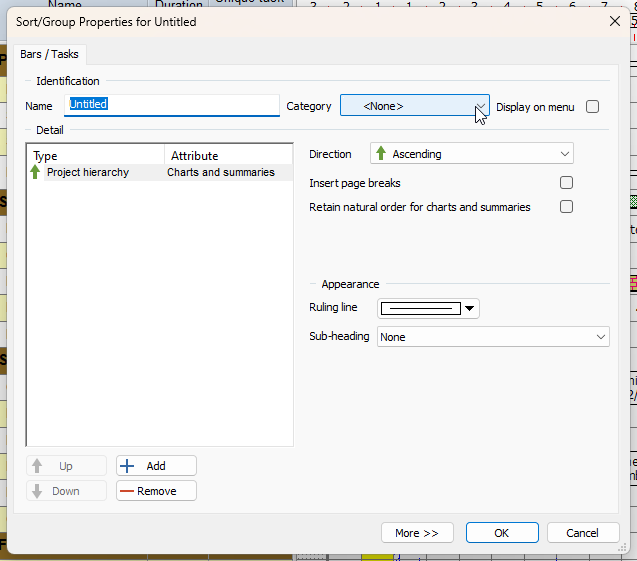
- Enter "Sub-Contractors and Start" in the Name field. You can set up as many sorts/groups as you need and the name identifies each one.
- Select the Display on menu check box. This makes the sort/group available on the Sort/Group dropdown, making it easier to apply.
Note the Category field. As with filters, you can create sort/group categories in Library Explorer and use these to organise your sorts/groups, making it easier to find the sort/group you want to apply if you have a large number of sorts/groups in a project. - You will now edit the criteria of the sort/group. Click Add. A row relating to a new sort/group criterion appears in the left hand pane.
- You want to sort/group the tasks in the project, so in this row, select Task in the Type column.
- Click the sort/group criterion in the Attribute column and select Codes - Sub-Contractors from the dropdown list of available attributes that appears.
- Select "Sub-heading with only name column" in the Sub-heading field to indicate that you want to display a subheading above each group of tasks that are sorted by this criterion, indicating the location at which they are carried out.
- Select a colour to apply to the subheadings in the Sub-heading colour field and select the Display banding in the spreadsheet check box to indicate that you want to highlight the subheadings by continuing their colouring vertically down the far left hand side of the spreadsheet. Displaying banding in the spreadsheet in sorts/groups that comprise multiple criteria makes it easier to identify the criteria to which sorted/grouped tasks and bars belong.
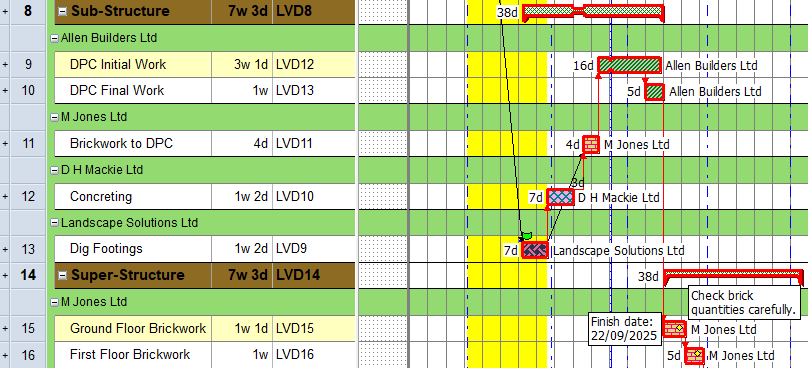
- Click OK to close the Sort/Group Properties dialog. The sort/group is applied to your current view automatically. Notice that the tasks are sorted within each summary group according to their Sub-Contractors code , identified in the green subheadings in the following illustration:
- To turn the sort/group off and return to your normal view, on the View tab, in the View Data group, click the Sort/Group dropdown and select Natural Order.
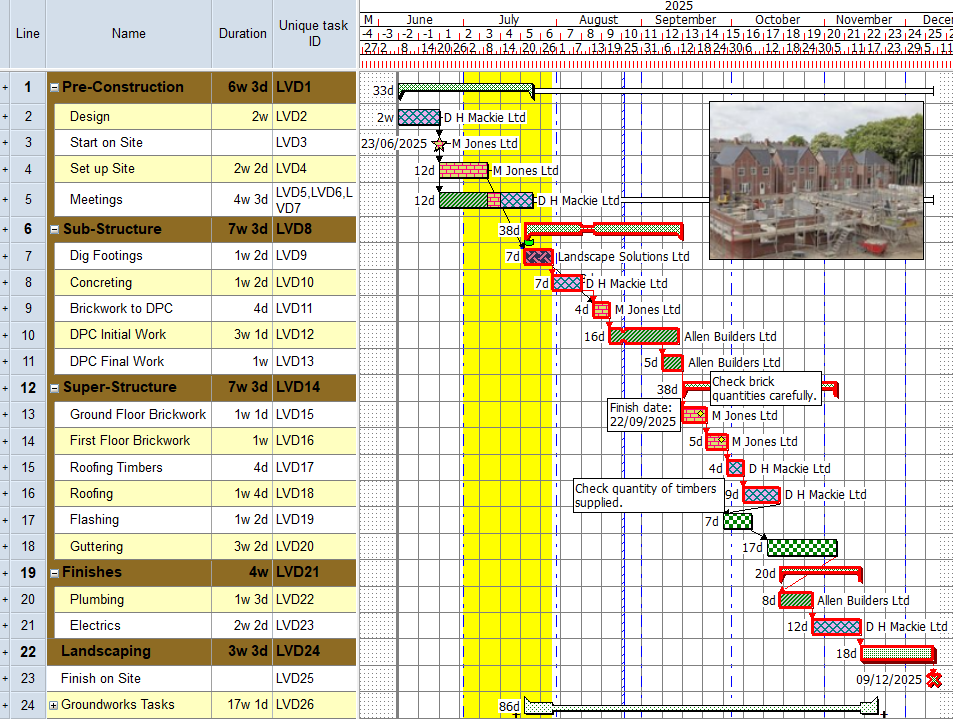
Your project should now look something like this (note that the dates and durations of tasks, and the appearance of codes and annotations, may be different):
| Previous | Next |
| Filtering tasks in a project | Creating resource libraries |