Moving and inserting bars
You can move bars vertically, to change the order of the tasks in a project.
Moving bars vertically
To move a bar vertically:
- Click in the Line column in the spreadsheet, in the row on which the Design task is located. The spreadsheet row, and the Design task, are selected:
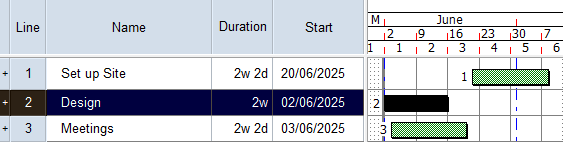
- Move the mouse pointer over the centre of the Design task until the cursor appears like this:

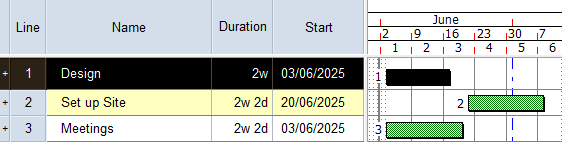
- Click and drag the bar to the line above. When you release the mouse button, the Design bar appears above the Set up Site bar:
Inserting bars
You can insert new bars into a project. You may want to do this to add new tasks in between two existing bars, or to add space between two existing bars, which can make a project more legible.
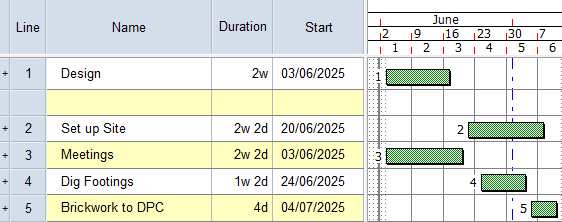
To insert a bar, right-click the Line column in the spreadsheet, in the row on which the Set up Site task is located, and select Insert Bar. A new bar appears before the Set up Site bar.
Your project should now look something like this (note that the dates and durations of tasks may be different):
| Previous | Next |
| Changing the dates of tasks | Using milestones to represent key dates |