Creating tasks
A project comprises a series of tasks that must be completed to achieve a set of objectives. A task is a unit of work that has a duration. Tasks are also known as activities.
You can create tasks by drawing them in the bar chart or by typing information into the spreadsheet.
Creating tasks by drawing in the bar chart
To create a task by drawing in the bar chart:
- Move the mouse pointer over the first bar in the bar chart.
- Press and hold down the left mouse button, then drag the mouse pointer left or right (dragging it up or down has no effect). A task appears on the bar and extends up to the mouse pointer. A popup box shows the start date, finish date and duration of the task as you drag:
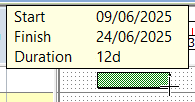
- Release the mouse button when the task is the length you want - 12 days in the illustration above. The task is displayed in black, indicating that it is selected.
- Click away from the task to deselect it:

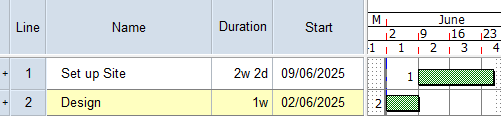
Whether you see exceptions on the bar chart - they appear as a shaded blue line - depends on where you have drawn your task. - At the moment, the task has no name. Click in the first row of the Name column in the spreadsheet and type "Set up Site", then press ENTER.
Creating tasks by typing information into the spreadsheet
To create a task by typing information into the spreadsheet:
- Click in the second row of the Name column in the spreadsheet, type "Design", then press ENTER.
- Click in the second row of the Duration column in the spreadsheet and type the duration you want to apply to the new task. For example:
- Type "3d" to create a task with a duration of three days.
- Type "2w" to create a task with a duration of two weeks.
- Type "1w 3d" to create a task with a duration of one week and three days.
- Press ENTER. A task with the duration you enter appears on the second row of the bar chart.
Depending on the way in which Asta Powerproject is configured, you may also be able to create tasks by entering their names in the Name column of the spreadsheet. In the Construction Template you have used to create this project, entering names into the Name column does not create tasks; it merely names the bars. Try this now:
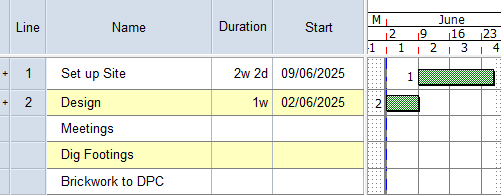
- Enter the following names into the third, fourth and fifth rows of the spreadsheet:
- Meetings.
- Dig Footings.
- Brickwork to DPC.
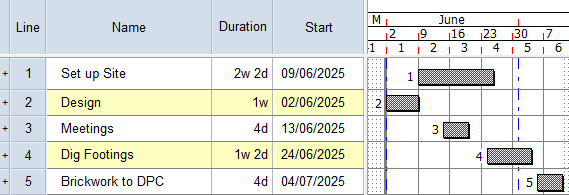
- Draw three tasks on bars 3, 4 and 5 of the bar chart to correspond to these three tasks.
Your project should now look something like this (note that the dates and durations of tasks may be different):
| Previous | Next |
| Configuring a project's calendars | Saving and closing a project |