Configuring a project's calendars
Calendars define the working and non-working time in a project. Working time is time during which tasks can be worked on. Non-working time is time during which tasks are not worked on, for example night-time, lunch breaks, weekends and holidays.
A calendar comprises a planned pattern of work - a work pattern - to which exceptions can be added. An exception is a period of working or non-working time that does not conform to the planned pattern of work, for example a holiday or a period of overtime.
A project can contain
To view the calendars that are available in a project, click + next to Calendars in the project view:
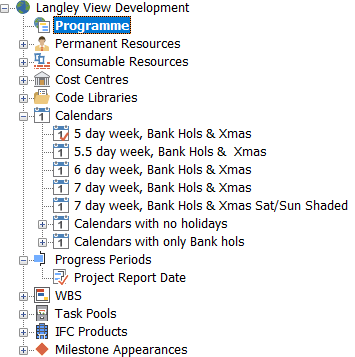
The calendars that are available depend on the template you have used to create the project.
Specifying the project's default calendar
Because you have used the

This shows that it is the project's default calendar. Any task you create in the project will follow the default calendar's work pattern.
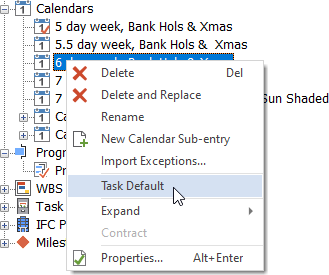
If you have more than one calendar in a project, you specify which is the default calendar by right-clicking the calendar in the project view and selecting Task Default. Try this now:
- Right-click the
The Calendar Settings dialog appears: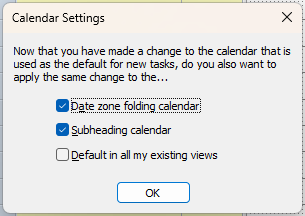
- You use this dialog to specify where you want to apply the selected calendar. Click OK. Note that the red tick is now displayed on the
Before you continue:
- Right-click the
- Click OK to close the Calendar Settings dialog. The red tick is now displayed in the
Editing the default calendar
You should edit the calendars in a project to make sure that they reflect the specific working times of the project.
To edit the default calendar, right-click the
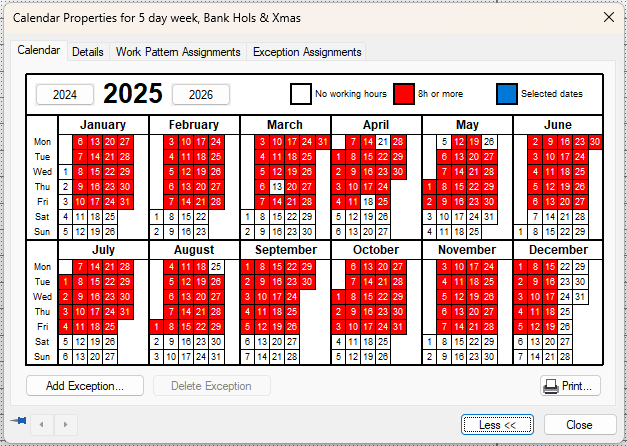
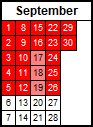
By default, if a day is coloured red, it contains working time according to the calendar's work pattern; if a day is coloured white, it contains no working time. Days shaded pink contain one or more exceptions that reduce the day's working time.
Viewing a day's working and non-working time
To view a day's periods of working and non-working time, double-click the day. The Working Hours dialog appears:
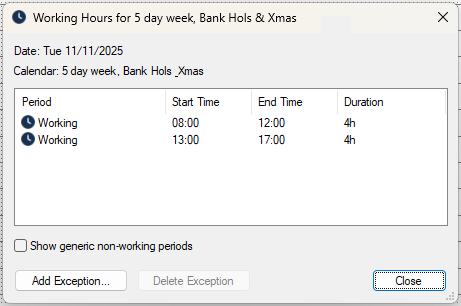
Click Close to close the dialog and return to the Calendar Properties dialog.
Adding exceptions to a calendar
You add exceptions to calendars to represent periods of working or non-working time that do not conform to the planned pattern of work, for example a holiday or a period of overtime.
To add an exception to a calendar:
- On the Calendar tab of the Calendar Properties dialog, you select the date, or dates, to which you want to add an exception as follows:
- To add an exception to a single date, click the date.
- To add an exception to a range of contiguous dates, click the first date in the range, hold down SHIFT, then click the last date in the range.
- To add an exception to a number of non-adjacent dates, hold down CTRL and click each date one by one.
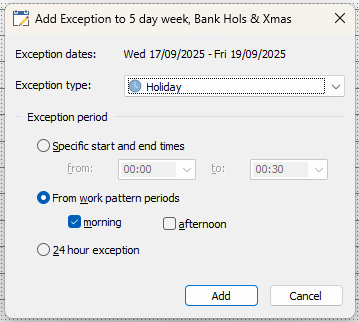
- Click Add Exception. The Add Exception dialog appears.
- Select "Holiday" in the Exception type field.
- Specify the duration of the exception in the Exception period group. You can enter specific start and finish times, specify that the exception covers a whole morning or afternoon, or specify that the exception covers the entire day. In this instance, click the From work pattern periods radio button and select the morning check box to specify that the exception applies to mornings only:
- Click Add. The exception is illustrated on the calendar (you need to click away from the selected date or dates to see this). In the illustration below, a morning holiday has been added to the
Deleting exceptions from a calendar
Deleting an exception from a calendar returns the date - or dates - back to the calendar's standard work pattern.
Try this now, by deleting the exception you have just added to the calendar:
- On the Calendar tab of the Calendar Properties dialog, select the three dates to which you had added an exception.
- Click Delete Exception. You are asked to confirm that you want to delete all exceptions from the selected dates.
- Click Yes. All exceptions are deleted from the selected dates.
Before you continue, click Close to close the Calendar Properties dialog.
| Previous | Next |
| Creating tasks |