Creating multiple tasks on the same bar
You can create more than one task on each bar. This is useful if a project contains several tasks of the same type, or if you want to model a repeated process that is made up of a number of single tasks.
Drawing additional tasks on a bar
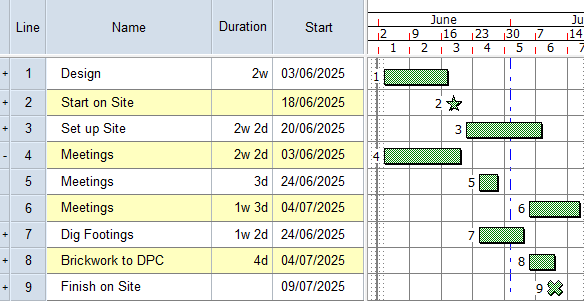
Draw two more tasks to the right of the existing Meetings task:

Note that the spreadsheet displays information relating to all of the tasks on the bar: the Start column displays the start date of the first task, the Duration column displays the total duration of all three tasks and the Finish column displays the finish date of the last task.
Working in one-task-per-line mode
When you have bars containing more than one task, you can display them in one-task-per-line mode, where each task on a bar is displayed on a separate bar line. You turn one-task-per-line mode on for a bar by clicking the + symbol in the left-most column of the spreadsheet:
Try this now: click the + symbol in the left-most column of the spreadsheet for the Meetings bar. The Meetings bar is now displayed in one-task-per-line mode, with each task displayed on a separate bar; on the first Meetings bar, the + symbol in the left-most column of the spreadsheet has turned to a - symbol:
Note that the spreadsheet now displays information about each individual task.
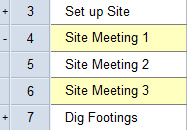
Click in the Name column of the spreadsheet and rename the three Meetings tasks as follows:
- Site Meeting 1.
- Site Meeting 2.
- Site Meeting 3.
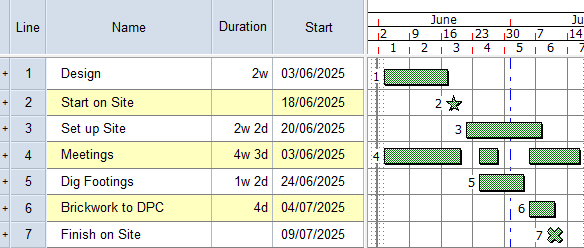
Now click the - symbol in the left-most column of the spreadsheet for the first Meetings bar. The three Meetings tasks are once more displayed on the same bar, which is still called "Meetings": you have renamed the tasks on the bar, but not the bar itself.
Rolling up existing tasks onto the same bar
If you have created a number of tasks on different bars and you decide subsequently that you want to move them onto a single bar, you can roll them up onto the same bar.
To try this out
- First create three new tasks on the three bars beneath the Finish on Site task, with one task on each bar:

- Click the Line column of the spreadsheet for the first of these three tasks.
- Hold down SHIFT.
- Click the Line column for the last of the three tasks. All three bars are now selected:

- On the Home tab of the Ribbon, in the Hierarchy group, click
 . The three bars are combined into a single bar:
Before you continue, click the Line column in the spreadsheet for the new bar and press DELETE to delete the bar and its three tasks.
Your project should now look something like this (note that the dates and durations of tasks may be different):
| Previous | Next |
| Using milestones to represent key dates | Linking tasks |