Changing the start date of a project
When you reschedule, the start of the earliest task in a project is positioned at the start date of a project. You specify the project start date when you create a project, but you can change this date at any time. This can be useful if you are planning a future project and you are not sure of the exact start date when you start your planning.
To change the start date of the project:
- Click the File tab, then click Properties to display the Properties tab of the Backstage view.
- Click the
 dropdown in the Imposed start field and select a different start date from the calendar that appears:
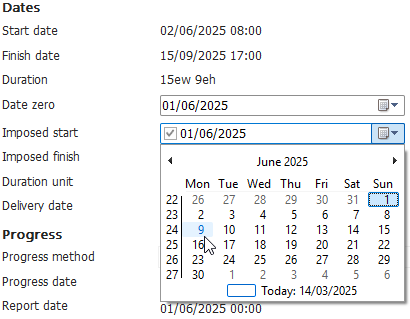
- If you select a later start date, a warning appears to inform you that the report date of your progress period is earlier than the new start date. Click OK to close the warning and change the report date of the progress period to match the new project start date.
- When you change the start date of a project, it is a good idea to change the project's date zero to match. This is the date at which unit numbering in any "elapsed units" or "working units" lines in the date zone begins. Click the dropdown in the Date zero field and select the same date as you selected for the project start date from the calendar that appears.
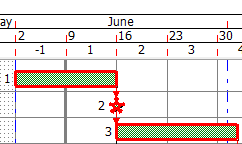
- Click the arrow at the top-left of the Backstage view to redisplay the project view, spreadsheet and bar chart. In the bar chart, a thick grey vertical line indicates the project start date. Note that this date has moved the date that you selected in the Imposed start field - in this case, 9th June:
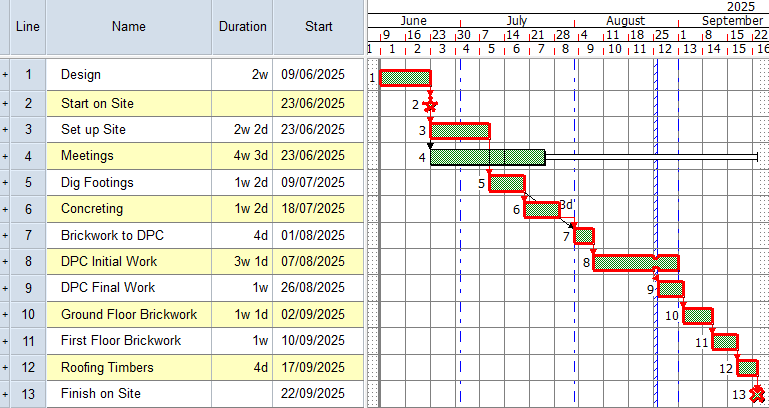
- Now that you have changed the project start date, the start of the earliest task is no longer positioned correctly. Reschedule the project again to reposition the tasks correctly, taking the new project start date into account.
Your project should now look something like this (note that the dates and durations of tasks may be different):
| Previous | Next |
| Rescheduling a project | Adding constraints to a project |