Baselining projects
A baseline is a record of all or any part of a project at a particular point in time. It contains a copy of everything in the project, for example bars, tasks, links, resource allocations, libraries and histograms. You can create as many baselines as you want for a project and use them to track the progress of the project by comparing current information (the live project) with planned information (the baseline). You can also update baselines periodically by merging new and changed information into them.
Creating baselines
To create a baseline of a project:
- In the project view, click the Programme chart. This is to ensure that when you create a baseline, the baseline covers the entire project, not just the contents of one or more charts or summary groups.
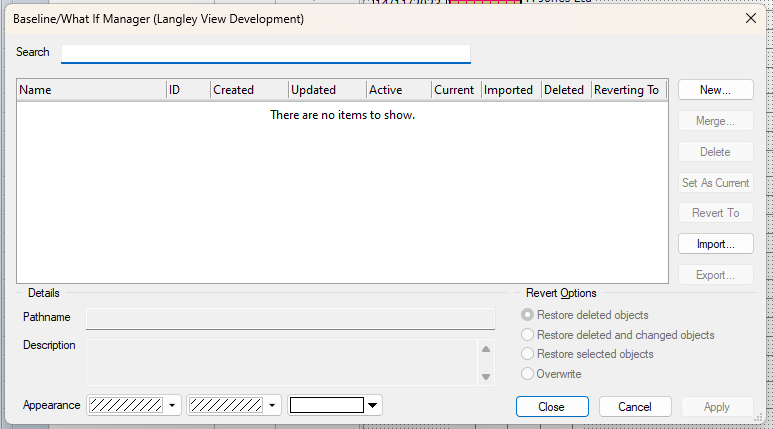
- On the Project tab, in the Properties group, click Baseline Manager. The Baseline/What If Manager dialog appears:
- Click New. The Details screen of the Baseline Wizard appears:
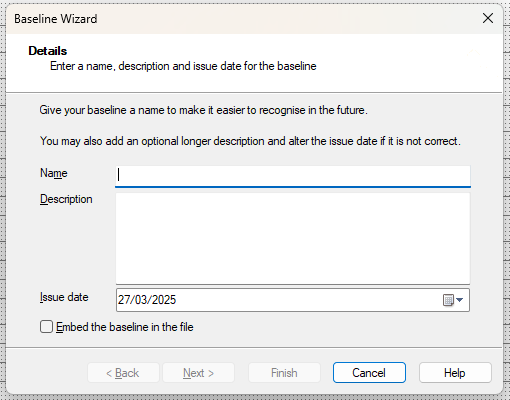
- Enter "Contract Programme" in the Name field. You can optionally enter a description as well and change the issue date, but for now leave these fields as they are, leave the Embed the baseline in the file check box cleared and click Next. The Destination screen of the Baseline Wizard appears.
- You can enter a file name for the baseline and specify the location in which it should be saved on this screen. For now, accept the default file name and location and click Next. The Scope screen of the Baseline Wizard appears.
- Click the All tasks in the current view radio button to indicate that you want to include all tasks in the baseline, then click Next. The Summary screen appears, giving you a summary of the options you have selected when creating the baseline.
- Click Finish to accept the options and create the baseline. The baseline appears in the Baseline/What If Manager dialog:
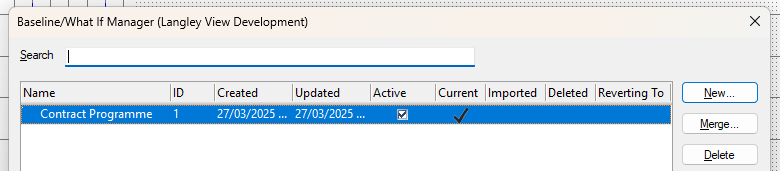
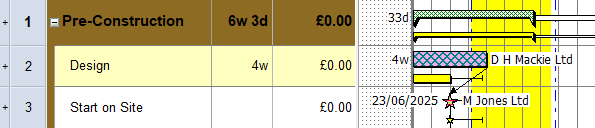
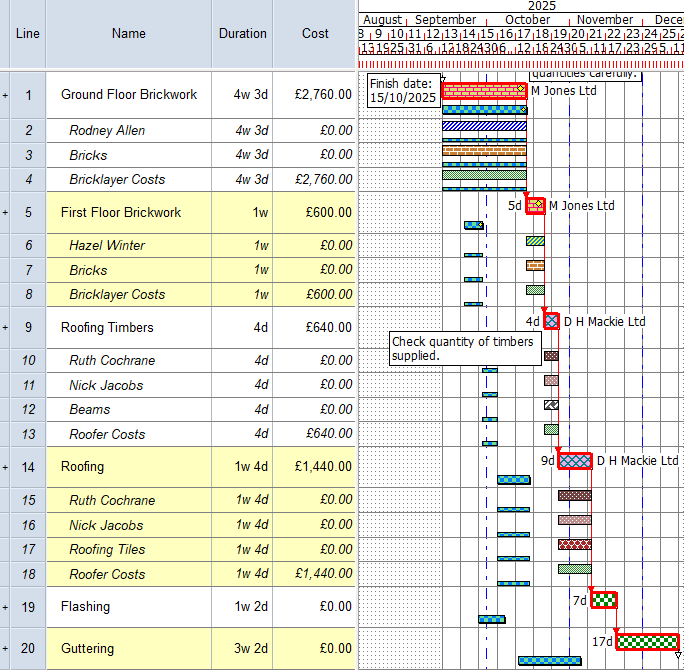
Note that a tick appears in the Current column for this baseline. If you have more than one baseline of a project, you specify which one is current, and you can display information about the "current" baseline in the spreadsheet and bar chart. - Click Close to close the Baseline/What If Manager dialog. The baseline version of each task is displayed in the bar chart in yellow, beneath the live tasks:

- At the moment, the baseline version of each task has the same dates and duration as the live tasks, as the project has not changed since the baseline was created. If you edit a task in the live data, the baseline version of the task will not be changed. Try this out: in the Pre-Construction summary group, increase the duration of the Design task so that it takes roughly twice as much time. Note that the live task is updated, but the baseline version of the task remains unchanged:
Configuring the display of baselines
You can configure the way in which baselines are displayed in a number of ways.
To change the colour of baseline tasks:
- On the Project tab, in the Properties group, click Baseline Manager. The Baseline/What If Manager dialog appears.
- Click the Contract Programme baseline to select it.
- Click the Appearance colour and pattern selectors to change the appearance of the baseline tasks:

- Click Close.
To display baseline tasks in their own bars:
- Right-click a blank area of the bar chart and select Format Bar Chart from the menu that appears. The Format Bar Chart dialog appears.
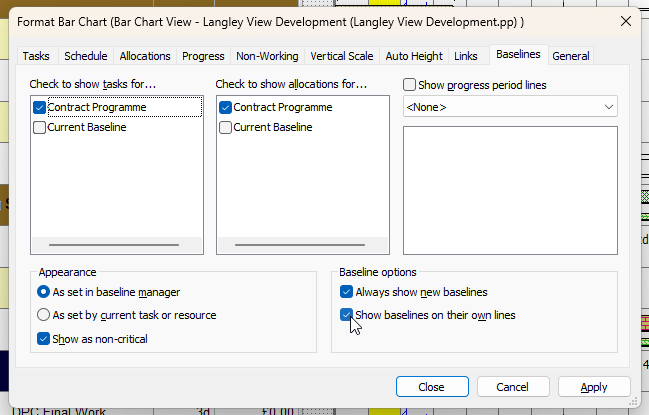
- Click the Baselines tab.
- Select the Show baselines on their own lines check box:
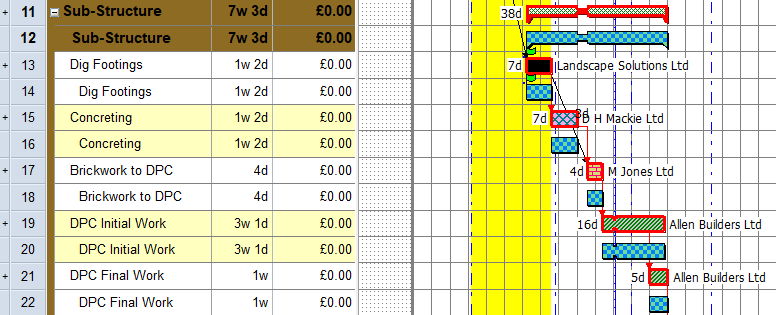
- Click Apply. Baseline tasks are now displayed in their own bars, rather than being displayed in the same bars as the corresponding live tasks:
- Before you continue, clear the Show baselines on their own lines check box and click Close, to display baseline tasks in the same bars as the corresponding live tasks once more.
To hide and show baseline tasks in the bar chart:
- On the Format tab, in the Show/Hide group, click
 to hide baseline tasks from the bar chart.
 - Click the control again to redisplay baseline tasks.
Before you continue:
- Click the Super-Structure summary group in the project view.
- On the Home tab, in the Schedule group, click
 and click OK to dismiss the Reschedule Progress Period Warning dialog when it appears.
Your project should now look something like this (note that the dates and durations of tasks, and the appearance of codes, annotations, resources
| Previous | Next |
| Assigning direct costs to tasks | Reporting variances against baselines |