Previewing your output
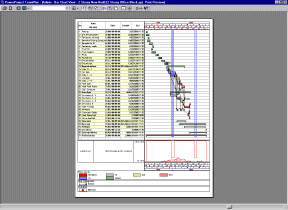
To preview the active view before printing, click the File tab, click Print, then click Full Preview. The Print Preview window opens, displaying the active view:

When you move the pointer over the preview, the cursor shape is ![]() . Click this cursor to zoom into the previewed page. The cursor shape then becomes
. Click this cursor to zoom into the previewed page. The cursor shape then becomes ![]() . Click this cursor to zoom out.
. Click this cursor to zoom out.
Alternatively, you can click and drag the ![]() cursor, holding down the left mouse button, to drag an area that you would like to zoom into. A box is drawn around the area as you drag. Release the left mouse button when you have selected the area to zoom into the selected area. The cursor shape then becomes
cursor, holding down the left mouse button, to drag an area that you would like to zoom into. A box is drawn around the area as you drag. Release the left mouse button when you have selected the area to zoom into the selected area. The cursor shape then becomes ![]() . Click this cursor to zoom out. Clicking and dragging an area enables you to zoom into a small area in great detail.
. Click this cursor to zoom out. Clicking and dragging an area enables you to zoom into a small area in great detail.
You can use the Print Preview toolbar to change options that you may have selected on the Print dialog to change the way in which the view is output. Pause the mouse pointer over any button on the toolbar to popup a brief description of that button.
Click ![]() to display a number of additional 'Display Switch' buttons in the Print Preview toolbar, which you can use to turn a number of elements of the display on and off instantly prior to printing. You may want to turn specific elements of the display off before printing for a variety of reasons. For example, you may want to
to display a number of additional 'Display Switch' buttons in the Print Preview toolbar, which you can use to turn a number of elements of the display on and off instantly prior to printing. You may want to turn specific elements of the display off before printing for a variety of reasons. For example, you may want to
Note that when you use these display switches in the Print Preview window - as opposed to using them in the Ribbon, where they are also available when viewing the bar chart - they affect the Print Preview window only, and not any views that you currently have open. For example, if you turn off the display of progress shading in the Print Preview window, print the view, then close the Print Preview window, progress shading will still be displayed in the current view.
To print from the Print Preview, click ![]() ; to close the print preview without printing, click Close.
; to close the print preview without printing, click Close.
When you preview your output in Asta Enterprise, any edits made while the Print Preview window is open are not reflected in the print preview or any subsequent printout.