Printing a border around your output
You can use the options in the Border file group on the Details tab of the Print dialog to select the border file with which you want to print the active view.
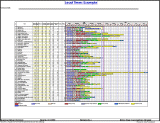
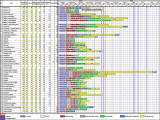
The following illustrations depict a project printed with and without a border:
|
|
|
|
Printed with a border |
Printed without a border |
To select a border, do any of the following:
- Enter a path and filename in the Border file field.
- Drop-down the Border file field to select a border in the directory path currently specified.
- Click Browse to locate a border.
If you want to print a 3D model or IFC group model alongside your project plan, you must use a border in which a model area has been defined, and you must ensure that the 3D model or IFC group model is displayed in the IFC Model pane.
The page sizes of the selected border and of the currently selected printer are displayed. In general, for best results with no distortion from scaling:
- When printing in paginated style, choose a border the same size as the paper on which the output will be printed.
- When printing in tiled style, choose a border the same size as the total number of pages across which the output will be printed.
Printing tiled or paginated output
Specifying horizontal and vertical pagination options

