Using the API Portal to learn about and construct API requests
You can use the Asta Vision API Portal to learn about and construct API requests. The API Portal describes the various operations that you can use to access and edit your Asta Vision and Asta Powerproject data in an API request, and shows the various parameters that you can apply to each operation. If you use the API Portal to construct sample API requests, you can then copy and paste these into external applications or into your own code, which saves you from having to code API requests from scratch.
To sign into the API Portal and access information on API requests:
- In a web browser, access the API Portal using the URL that has been provided to you by Elecosoft.
The URL of the API Portal differs for each Asta Vision API customer. Contact Elecosoft if you are not sure how to access the API Portal, or of your sign in details. - Sign into the API Portal using the user name and password that have been provided to you by Elecosoft.
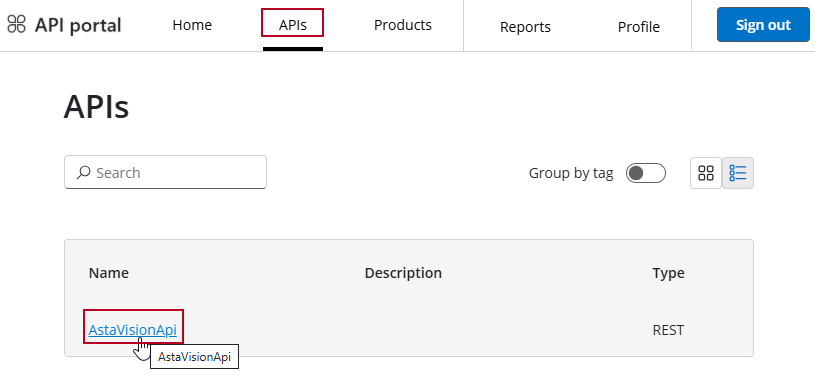
- Click APIs, then select the Asta Vision API from the list of APIs that is presented to you; (the Asta Vision API may be the only API in the list):
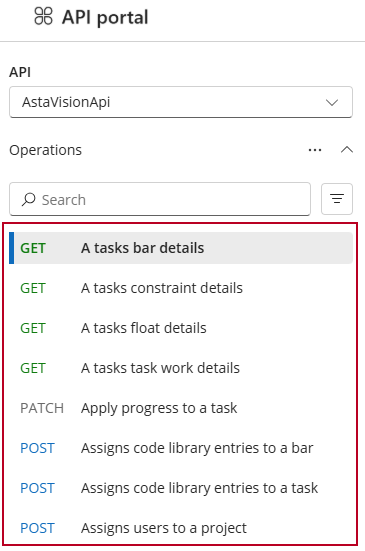
You see a page that displays information on the various operations that you can use to access and edit your Asta Vision and Asta Powerproject data in an API request.
A list of the operations that you can include in API requests is displayed on the left side of the page:
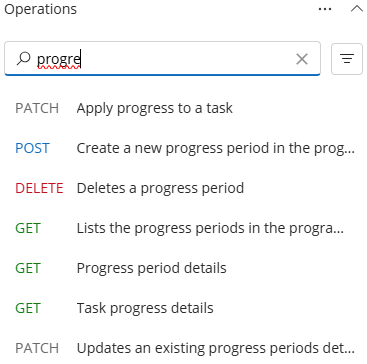
The list of operations is long. To find the operation you want, either scroll down the list, or start typing in the Search field. As you type, operations that match the text you enter appear in the list:
Click an operation to view its details.
The following table shows the information that is displayed about operations. Note that not all information is displayed for all operations. For example, for 'DELETE' operations, information about request parameters and the request body does not appear as they do not apply to this type of operation.
| Information type | Description |
|---|---|
| Endpoint |
The full URL that represents the API operation. The URL acts as the interface where requests are sent and responses are received.
The first element of the endpoint - for example http://apim-xxxxx.azure-api.net - is the API gateway endpoint, where all API requests enter.
The second element of the endpoint - for example /Vision/programmes/{programmeGuid}/data/tasks/{taskId}/bar - is the API path that identifies the specific operation.
Elements within the endpoint that are contained within curly braces ({}) are path parameters that should be replaced with real values in an API request. For example, the 'GET... a task's bar details' endpoint includes {programmeGuid} and {taskId} elements, that should be replaced by the IDs of the programme and the task in which you are interested.
Click |
| Request parameters |
Details of the values that must (or can) be supplied in the URL path when calling this API operation. Some parameters are required; others are optional.
For 'GET' operations, responses of collections are paginated, with a default page size of 25 items. If you do not specify a page number in a 'GET' request, only the first page of the collection is returned. If you want a page other than the first to be returned, enter the number of the page you require in a 'pageNumber' parameter. |
| Request headers |
Details of the headers that must (or can) be supplied in the URL path when calling this API operation. Headers are key-value pairs that provide metadata about an API request, which tell the API server how to interpret the request, provide authentication, control caching, and pass additional information needed for the operation. Some headers are required; others are optional.
All API requests require an 'Authorization' API access key to be supplied as a header - although this header is not included in this list.
For 'POST' and 'PATCH' operations that relate to Asta Powerproject data, an 'x-LockKey' header that locks or unlocks the relevant programme is required. |
| Request body |
For 'POST' and 'PATCH' operations, details of the data payload that must be sent in the body of an API request.
Click Table to view the request body in a simple format; click Schema to view the request body in a more technical format. Select the format in which you want to view the request body in the Content type field.
Click |
| Responses |
The various responses that can be returned from an API request using the operation, with an explanation of what each response means.
For some types of operation, an explanation of the data that will be returned is displayed. Click Table to view the structure of the data model that is returned in an easily-understood format, with each row in the table corresponding to a field in the response; click Schema to view the same information in a more technical format. Select the format in which you want to view the schema in the Content type field. |
| Definitions |
Details of the data models/schemas that are used by the API operation. These models describe the shape of the API request and response payloads for the operation - essentially, blueprints for what the API expects and returns.
For example, if an API request uses 'GET' to return bar data, data on the bar's code library assignments and user-defined fields will be returned as well as the bar data, and each data type - 'BarModel', 'CodeLibraryEntryAssignment' and 'UdfData' is described. |
You can use the API Portal's built-in test console to try out an operation using your Asta Vision and Asta Powerproject data, entering real parameters from your live data to construct a complete API request to check that an API request gives the response you want. This is useful as it enables you to:
- Validate the behaviour of an operation quickly without having to use an external tool.
- Learn how to call the API without having to write code.
- Debug or troubleshoot when something does not work in your production code.
- Copy and paste complete API requests into an external application, or into your own code.
To try out an operation with your own data and construct a complete API request:
- Within the API Portal, select the operation you want to try out and click Try this operation. A test console pane appears on the right-hand side of the screen.
- In the Authorization section, select the subscription key that enables you to access the Asta Vision API. This key, which enables API requests to be authenticated, must be included in the header of every API request.
- In the Parameters section, enter the values that must (or can) be supplied in the URL path when calling this API operation. Some parameters are required; others are optional. A red asterisk next to a parameter indicates that it is required.
For example, if you are trying out the 'Post... assigns code library entries to a bar' operation, you need to supply 'programmeGuid' and 'taskId' parameters - ie, the IDs of the programme and the task to which you want to assign codes.
To add an optional parameter, click Add parameter and enter the name and value for the additional parameter. Refer back to the previous screen for details of the parameters that can be supplied when calling this API operation. - In the Headers section, enter the headers that must (or can) be supplied in the URL path when calling this API operation. Some headers are required; others are optional.
All API requests require an 'Authorization' API access key to be supplied as a header.
For 'POST' and 'PATCH' operations that relate to Asta Powerproject data, an 'x-LockKey' header that locks or unlocks the relevant programme is required.
The subscription key that enables you to access the Asta Vision API - which you selected in the Authorization section above - is inserted automatically as a header.
To add a header, click Add header and enter the name and value for the additional header. Refer back to the previous screen for details of the headers that can be supplied when calling this API operation. - The Body section is where you define the payload - the actual data - that gets sent in an API request. The main field in this section is pre-populated with an example structure for the request.
Enter appropriate data into each field in the example API request, replacing "string" or 0 with real values. The data you have to enter depends on the operation. For example, you may have to enter an actual start date; a percentage complete; or a progress period ID. - The HTTP request section displays the fully-constructed API request - constructed using the information you have entered in the sections above - that Azure API Management will send when you click Send. It includes the HTTP method and URL; the request headers; and the request body. Think of it as a ready-made blueprint for integrating the API into your own applications.
Check the request to ensure that it contains the correct information. If you are troubleshooting to identify the reason for a failed request, you should check that the request contains the required headers, whether there are incorrect values in the body, or whether any of the parameters are incorrect. - To test the API request, click Send. When you do this, the request is sent and executed, and you see a response, including a status code, headers and body. View the response to check whether the operation has failed or succeeded. If it has failed, you can identify the reason for the failure, fix whatever is the cause, then click Send again to retest the API request.
- Once you are happy with the API request, click
 to copy it to the Windows Clipboard, from where you can paste it into an external application, or into your own code.
 - Close the test console pane when you have finished trying out the operation.
Introduction to the Asta Vision API